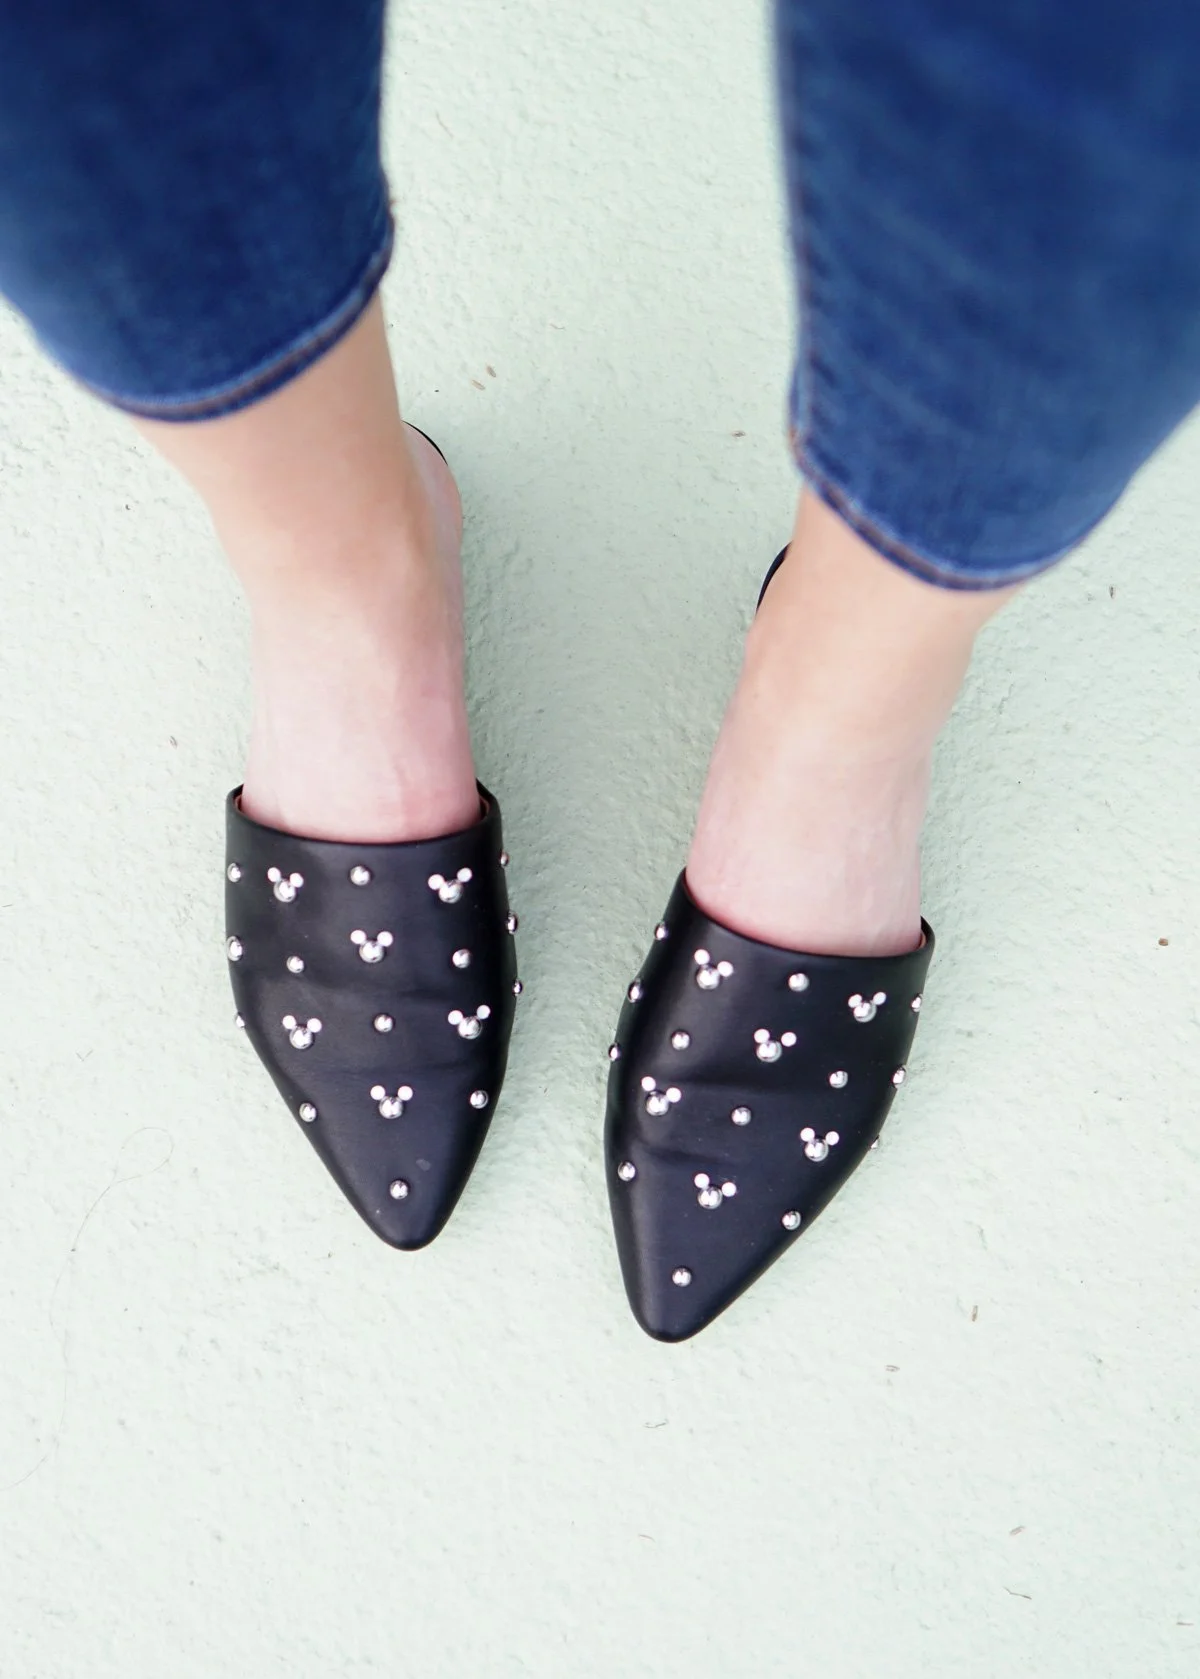
DIY Mickey Mouse Mules
’m always looking for ways to add subtle Disney style to my everyday outfits. When I saw these studded mules at Target last winter, I knew they’d be the perfect base for some DIY Mickey Mouse mules. My original vision was to use flat back pearls but once I saw these iridescent Swarovski crystals I changed my mind. I do think they’d look great with either, though!
Unfortunately these shoes aren’t available at Target anymore (womp, womp). I guess that’s what happens when you take too long to complete your craft projects! But I did happen to find and link a few other styles below that might also work for your DIY Mickey Mouse mules. Just keep in mind the size ratio between the studs and your added gems/crystals. Depending on your shoes, you might have to purchase smaller or larger additions.
Here’s what you’ll need to make these DIY Mickey Mouse mules:
Shoes with Studs
Super Glue – any type will work, but I prefer this one for the easy applicator.
Tweezers

STEP ONE:
Make a mental note of where you are glueing the crystals on each shoe. The studs on my mules are two different sizes, so I decided to add the crystals to the larger studs.
STEP TWO:
Working one crystal at a time, add a dot of glue to the shoe and then immediately place the crystal on top of the glue dot. I found that picking up the crystals with tweezers worked the best as I could see better vs. using my fingers.
STEP THREE:
With firm pressure, hold the crystal in place for 30 seconds. Repeat steps 1-3 until all of your studs have turned into sparkly Mickey Mouse heads!


And there you have it! A quick and easy way to add a little bit of magic to your everyday wardrobe. Make sure to check out my other DIY projects if you liked this tutorial.